A new generation of lights: Part 2: Seeing differently - the creative techneques
Written by: Jake Hicks
London-based editorial and fashion photographer Jake Hicks has built his reputation on one obsession: bold, vibrant studio portraiture created entirely in-camera.
Breathing portraits
So, are there any benefits to these new ‘video’ lights for us stills shooters? One aspect of flash that I’d forgotten about is that it always freezes the subject stock-still in razor-sharp clarity. You can’t dial that back. No matter what shutter speed you use, a flash typically records the scene at around 1/4000th of a second. You can’t capture someone ‘kinda still’ with flash. This is no longer the case with LEDs, and finally, us studio shooters can dust off the shutter speed dial on our cameras and start to use it as a creative tool and not just a technical one.
Trigger warning: I’m about to lose some of you, so I apologize, but I’ve started to shoot some studio portraits at 1/30th and even 1/15th of a second!
For those of you still reading and with my studio-lighting heresy aside, these far longer shutter speeds, in conjunction with the continuous LED lights, allow for the subject to come alive in a portrait. In a time when many photographers use the same camera from the same brand, modern photography can start to look a little homogeneous. Couple this with generational distrust of imagery thanks to AI, and this very modern, clinical look to images can leave people cold when they view them. To be clear, there is absolutely a time and place for very polished and pristine photos where we can see the DNA in every pore of the subject’s skin, but if you’re after something with a little more story to it, a very slight sense of movement to the image can give it a little extra life.
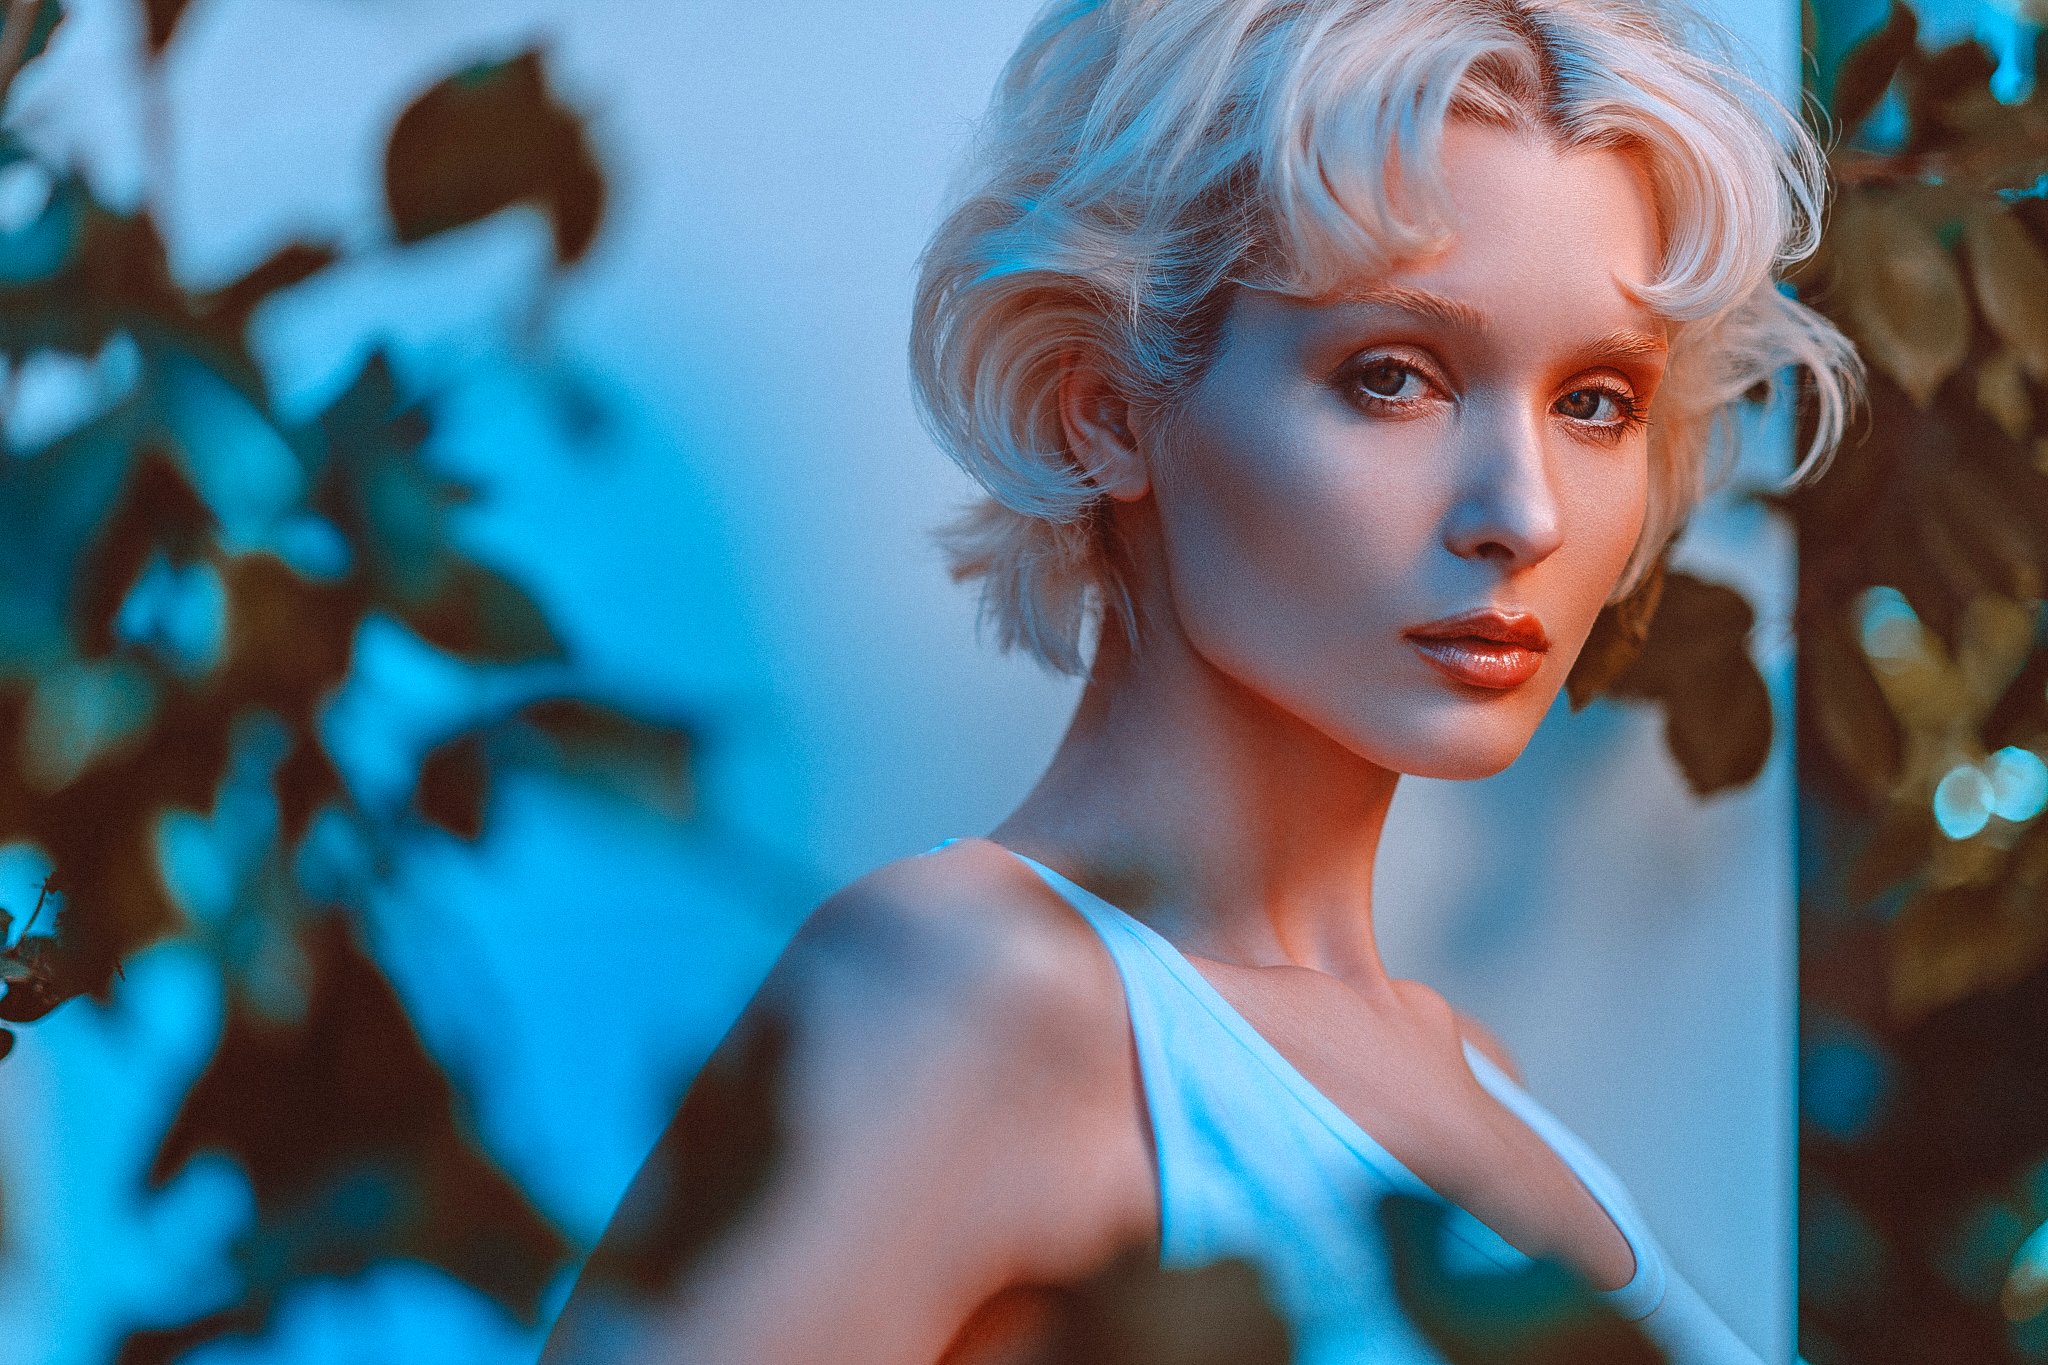
The portrait above was shot at 1/15th of a second. Yes, there is some movement in the image, and no, the eyes aren’t pin-sharp due to some slight movement, but that all adds to the image’s story. The hair in this shot has even more motion to it, and the image as a whole feels a lot more alive, and dare I say ‘cinematic’, than if I’d shot it with a flash at 1/4000th of a second. Again, there is a time and a place for this, and I certainly don’t shoot all my shots 1/15th of a second, but LEDs and their continuous light now give me options that I simply didn’t have before.
Unique colours
Don’t panic, I’m not claiming LEDs have invented any new colors, but with their advanced interface and the way they seamlessly switch to different colors instantly, they can offer some truly unique color-looks that simply aren’t possible with flash.
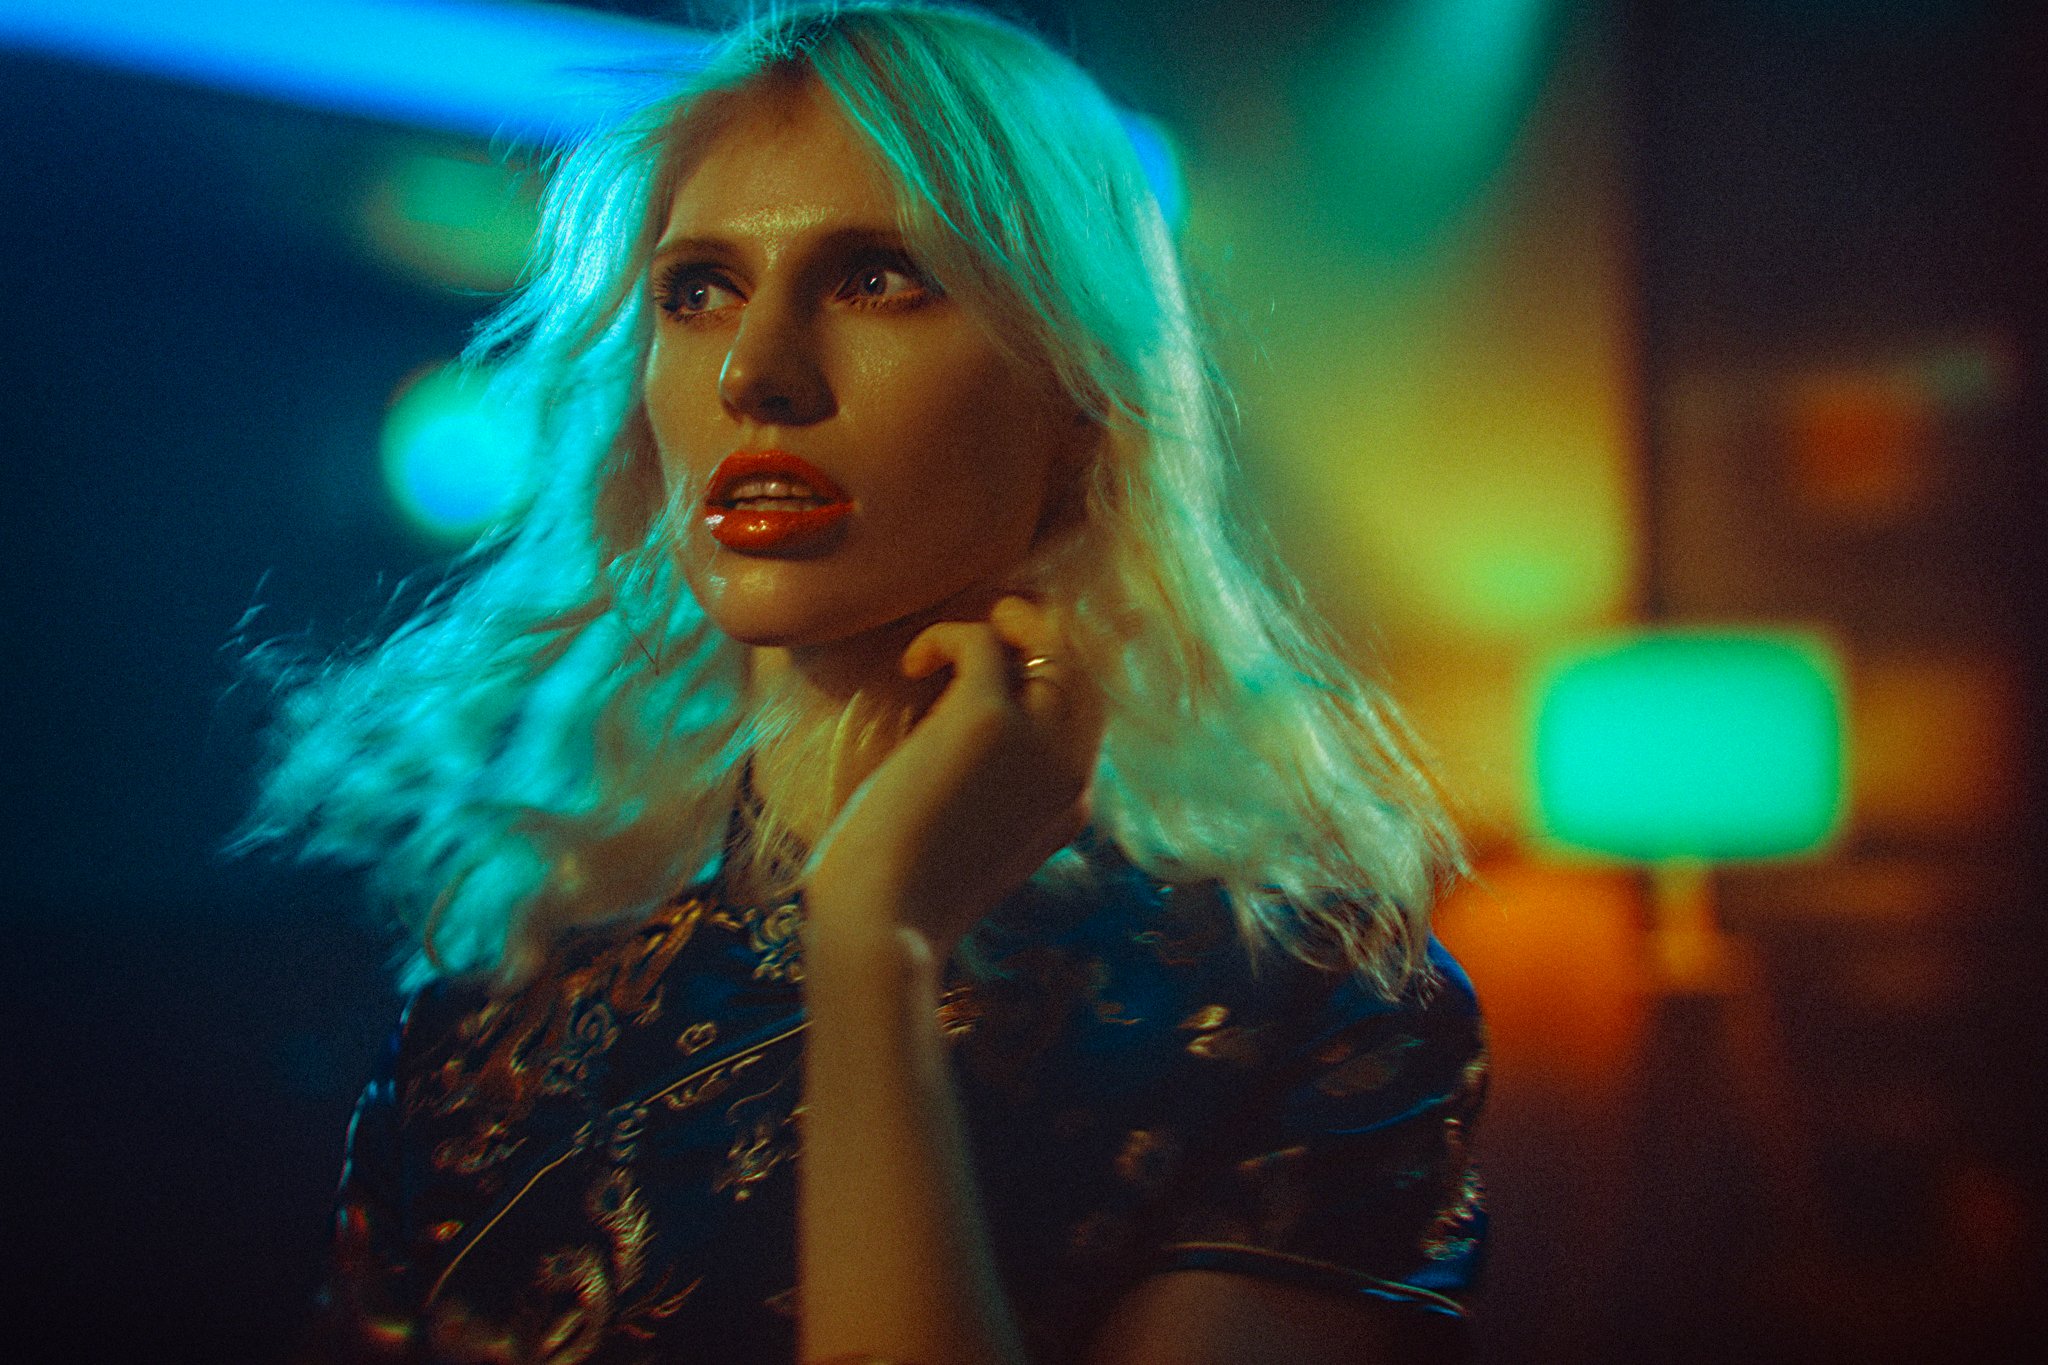
In the images above, I’m using a pre-programmed LED color effect to seamlessly change the colors during a long exposure, and you can see the varying colors being displayed on the background. This technique of using the looping LED color effects during long exposures has a ton of scope, and its possibilities are still largely unexplored. I’m certainly looking forward to delving deeper into these new LED effects.
Kelvin as a creative tool
For those of us who’ve been shooting for a little while, we’re probably pretty familiar with the kelvin range and how to use it to ‘correct’ some of the lighting issues we might encounter. One of the biggest surprises for me with LEDs was just how much I use the kelvin range on these new heads. Sure, we had color temperature gels with flash before, but they were fairly limiting. Yes, we had 1/4, 1/2, and full CTO (color temperature orange) and CTB (color temperature blue) gels before, but they were nowhere near as flexible or as comprehensive as a simple kelvin slider on nearly all modern LEDs. Plus, those gels were a nightmare to use on larger modifiers and gelling a 4ft octa with a CTO was not only time-consuming and costly, but also a massive pain in the ass.
Now with LEDs, you simply turn a dial, and in seconds, you have whatever kelvin your heart desires. And this is something I utilize on nearly EVERY photoshoot I do. You can spot a flash shot a mile away, as it’s often the base 5500K, and every shot looks the same because of it. Now, if you want to tell more of a story with your subject or scene, you can choose a kelvin color to match the tone. Warm up the key for a more organic and natural look or cool it down for a more industrial and colder look. The kelvin slider on LEDs is a great example of a tool I never thought I needed, and now I use it on nearly every shoot.
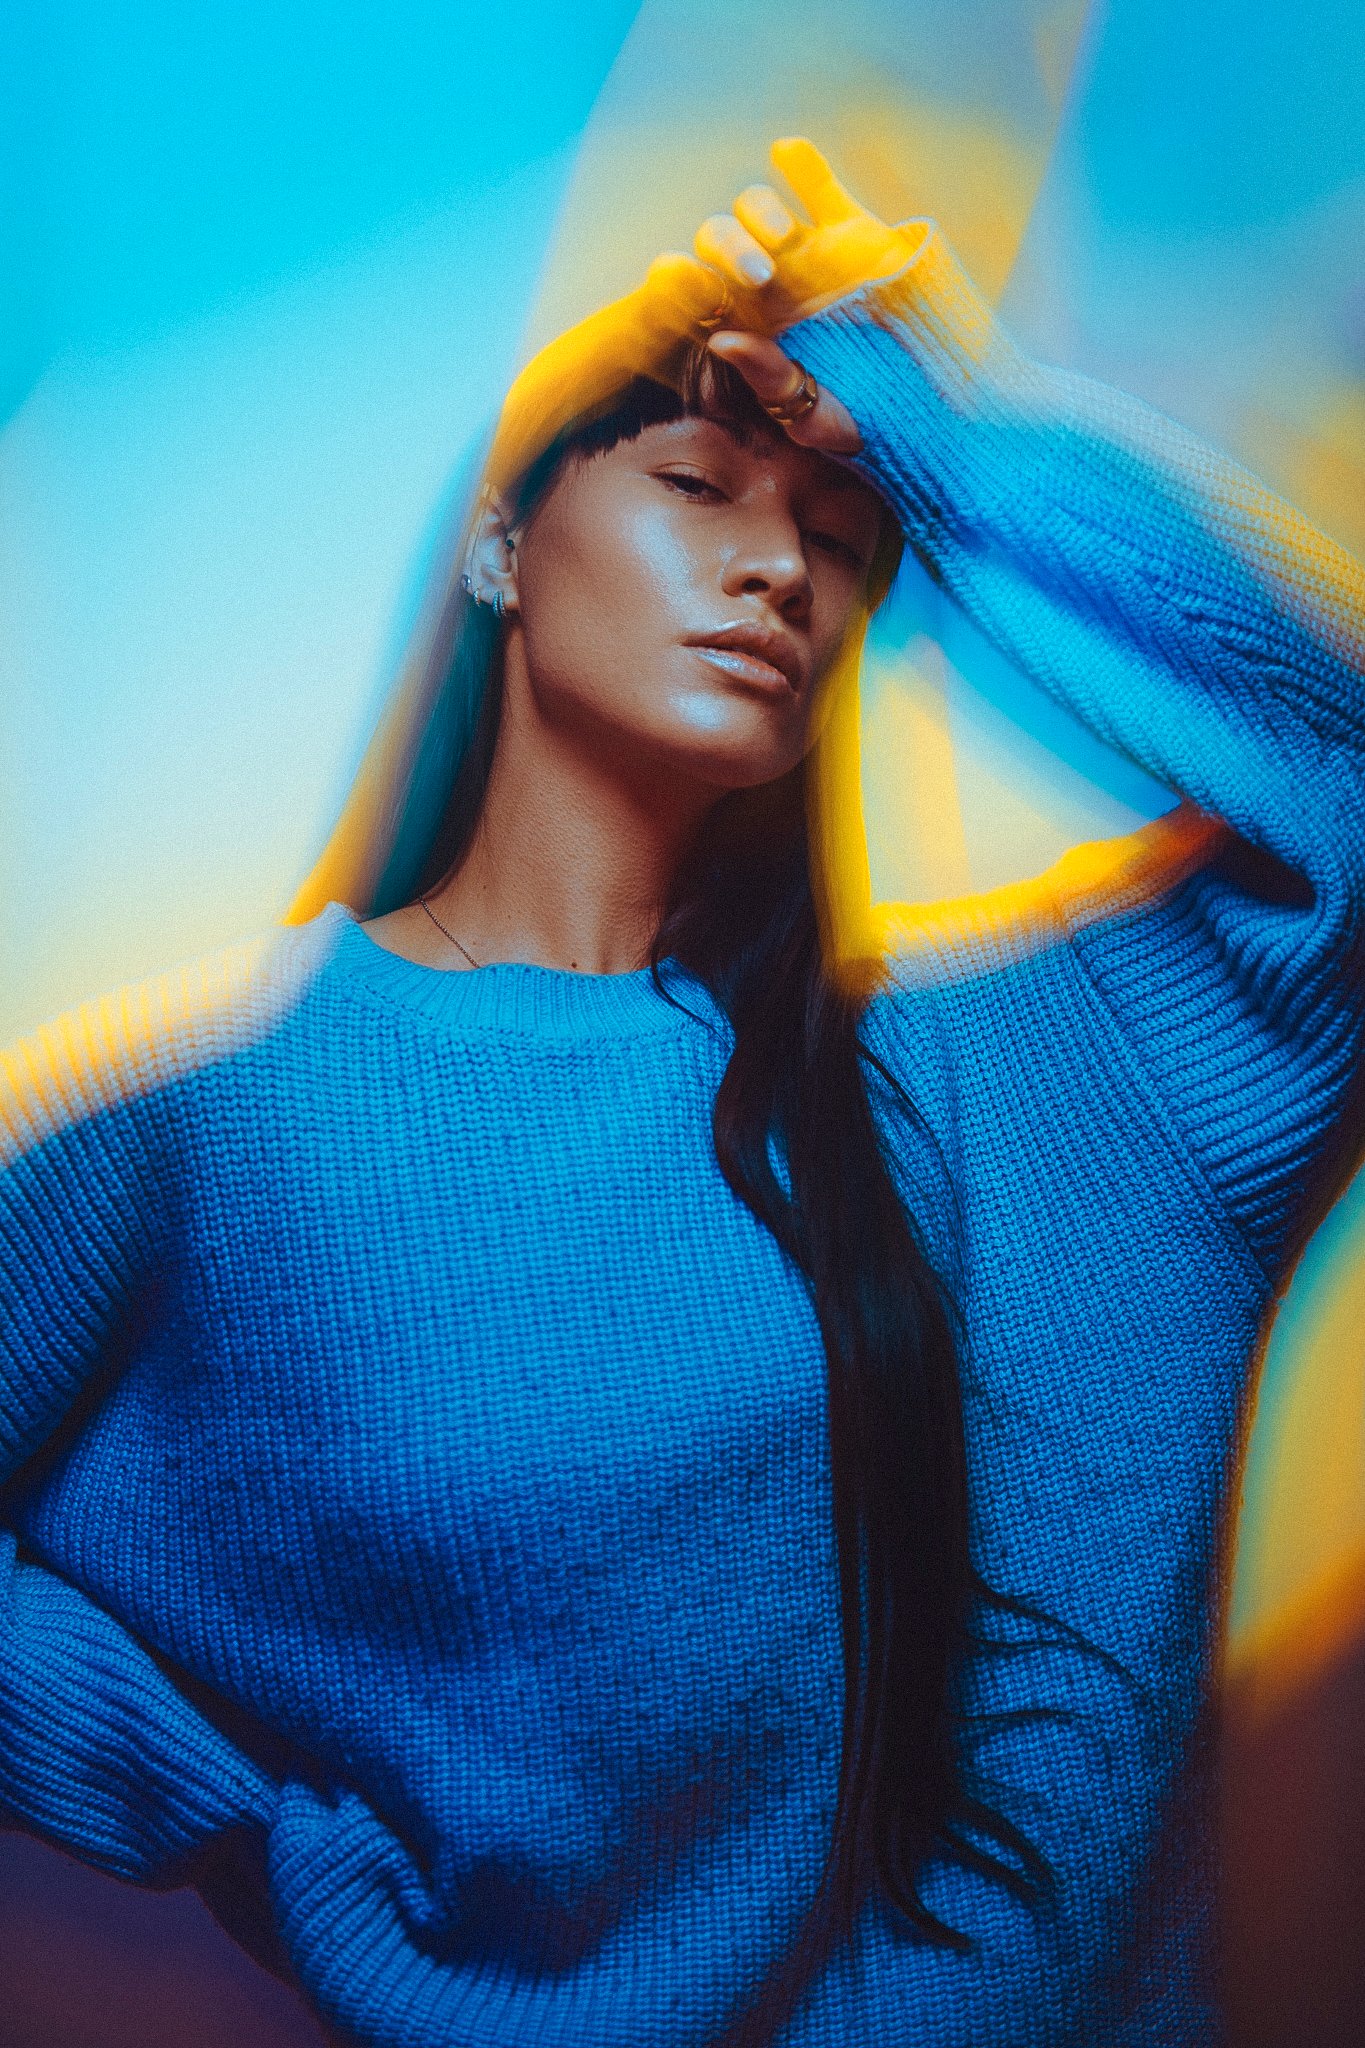
In the image above, I’m using an LED to light the model’s face, and you can see it’s set to a very warm kelvin. The other blue tones you see in this shot are actually daylight, and I’m using a combination of extremely warm kelvin to contrast the colder daylight, then balancing it in-camera via the white balance. Firstly, yes, you can use these powerful modern LEDs outside in conjunction with daylight, and second, this setup takes seconds to achieve thanks to the convenience of the onboard kelvin slider. It’s also worth adding here that the new Profoto L600C allows you to crank the Kelvin range to the proverbial 11! Most modern LEDs have a kelvin range of 3000K to 6500K. But thanks to Profoto’s unique triple-white chip technology, their new LEDs have a staggering kelvin range of 2000K to 15000K! This vast range allows for some truly beautiful color temperature contrasts, and you can see me playing with those extremes in color in my recent shoot with the L600C.
Saturation is now a choice, not a given
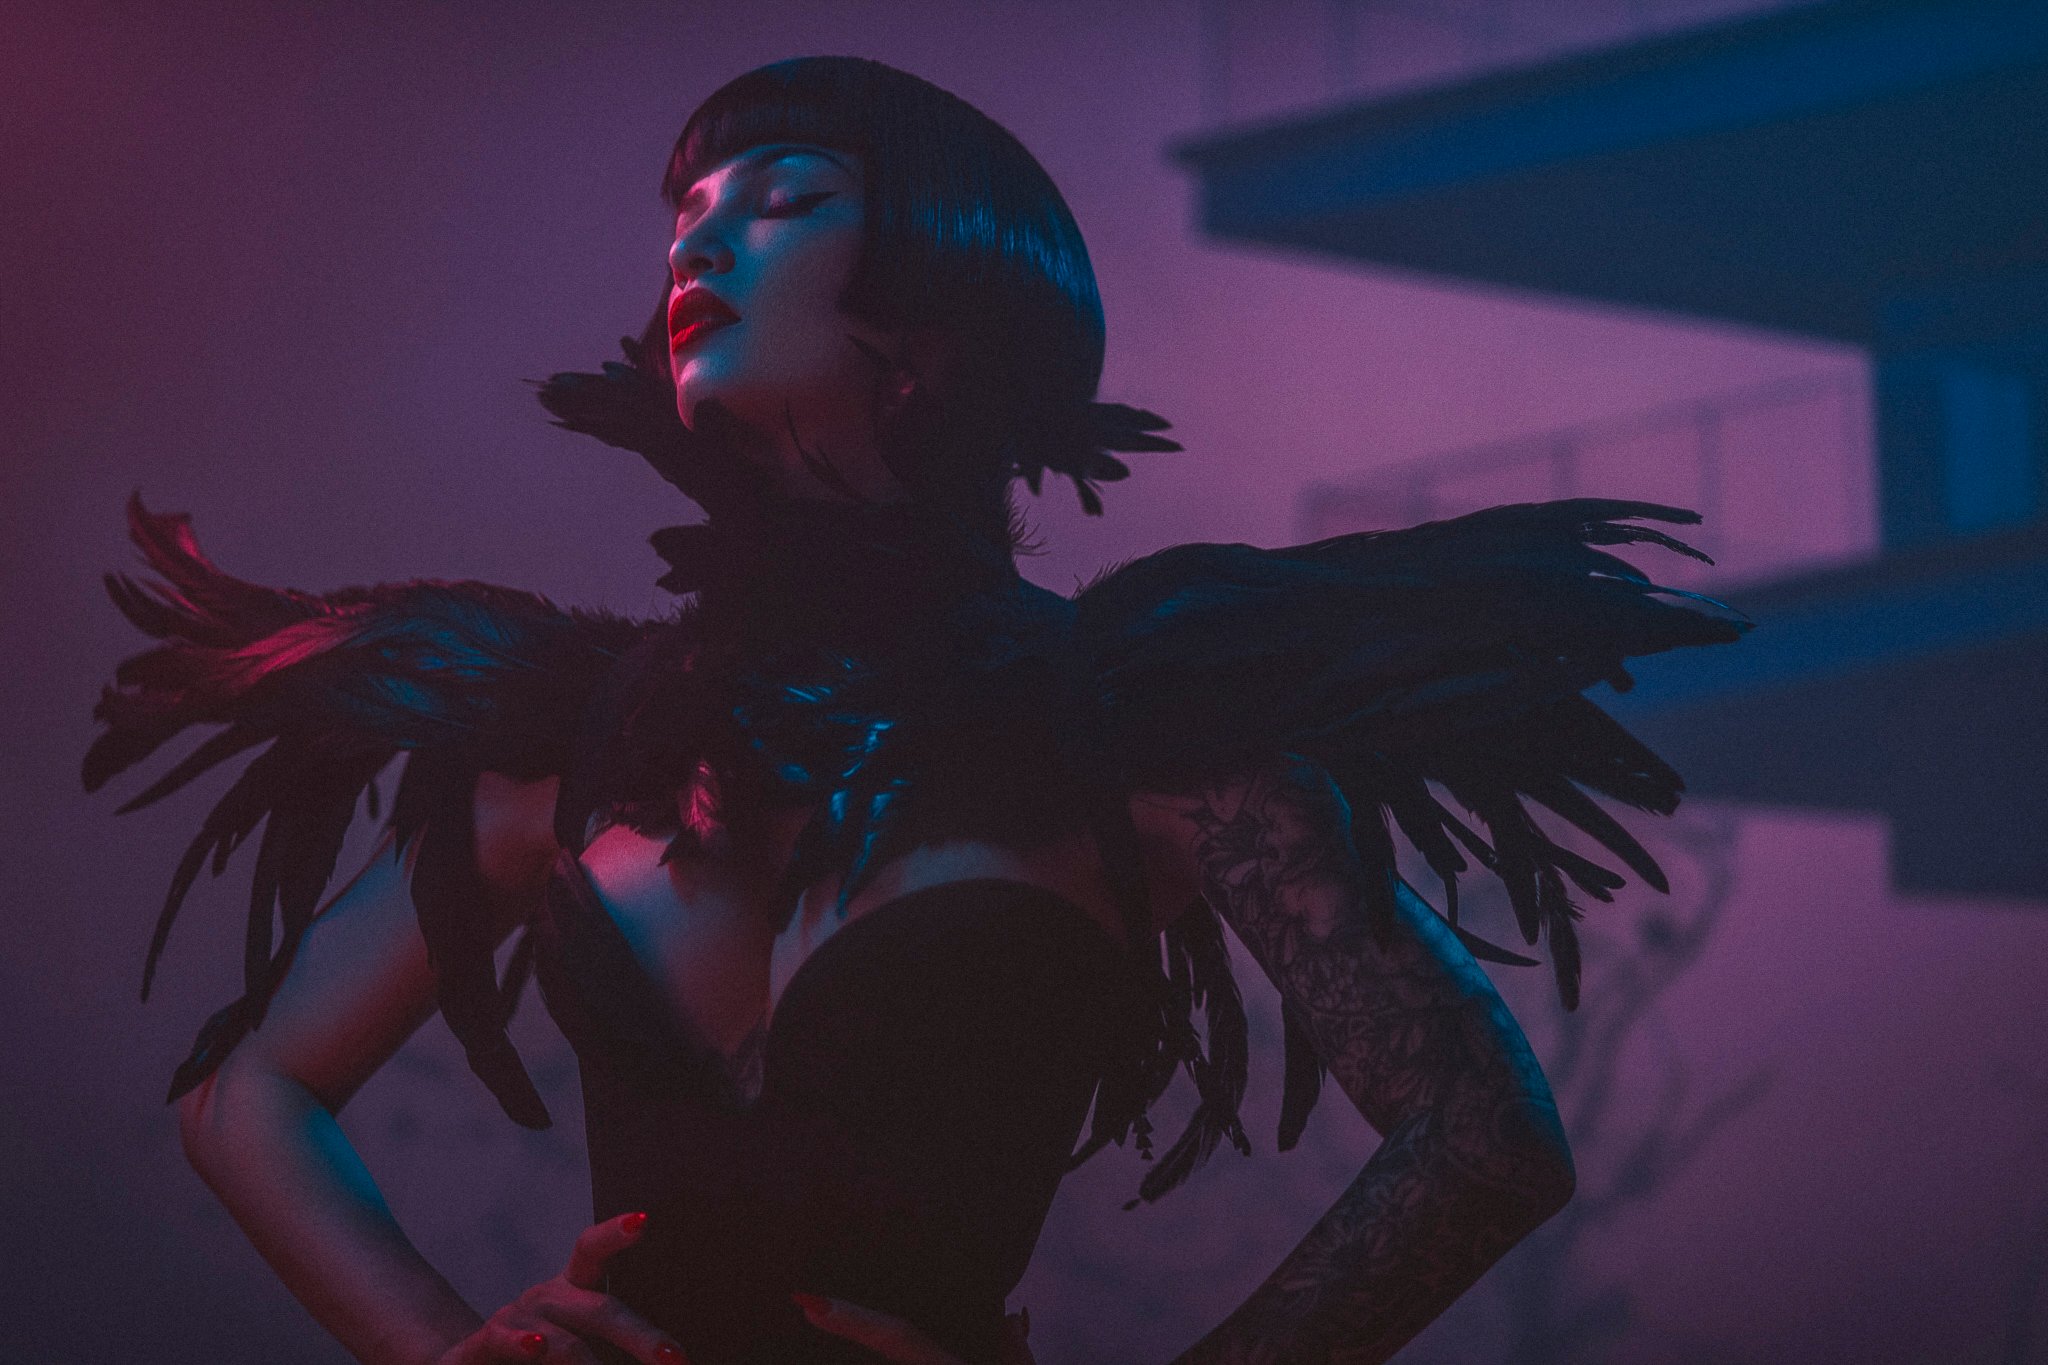
The idea of color saturation as a creative choice at the point of capture is a new one to many. Historically, we’d have colored gels on our lights, sure, but for the most part, those gels would be very saturated. In most colored-gel shots you’ve seen in recent years, the colors are vibrant, and the saturation is cranked to the max. Yes, there were softer, pastel gels you could purchase to achieve a more subtle color, but they were limited, offered a very delicate color and were tricky to use because of it. Today, one of the most powerful tools a modern RGB LED has is its saturation slider, yet almost nobody uses it. So, again, if you want those beautifully soft and delicate pastel colors, LED lights make it infinitely easier to achieve.

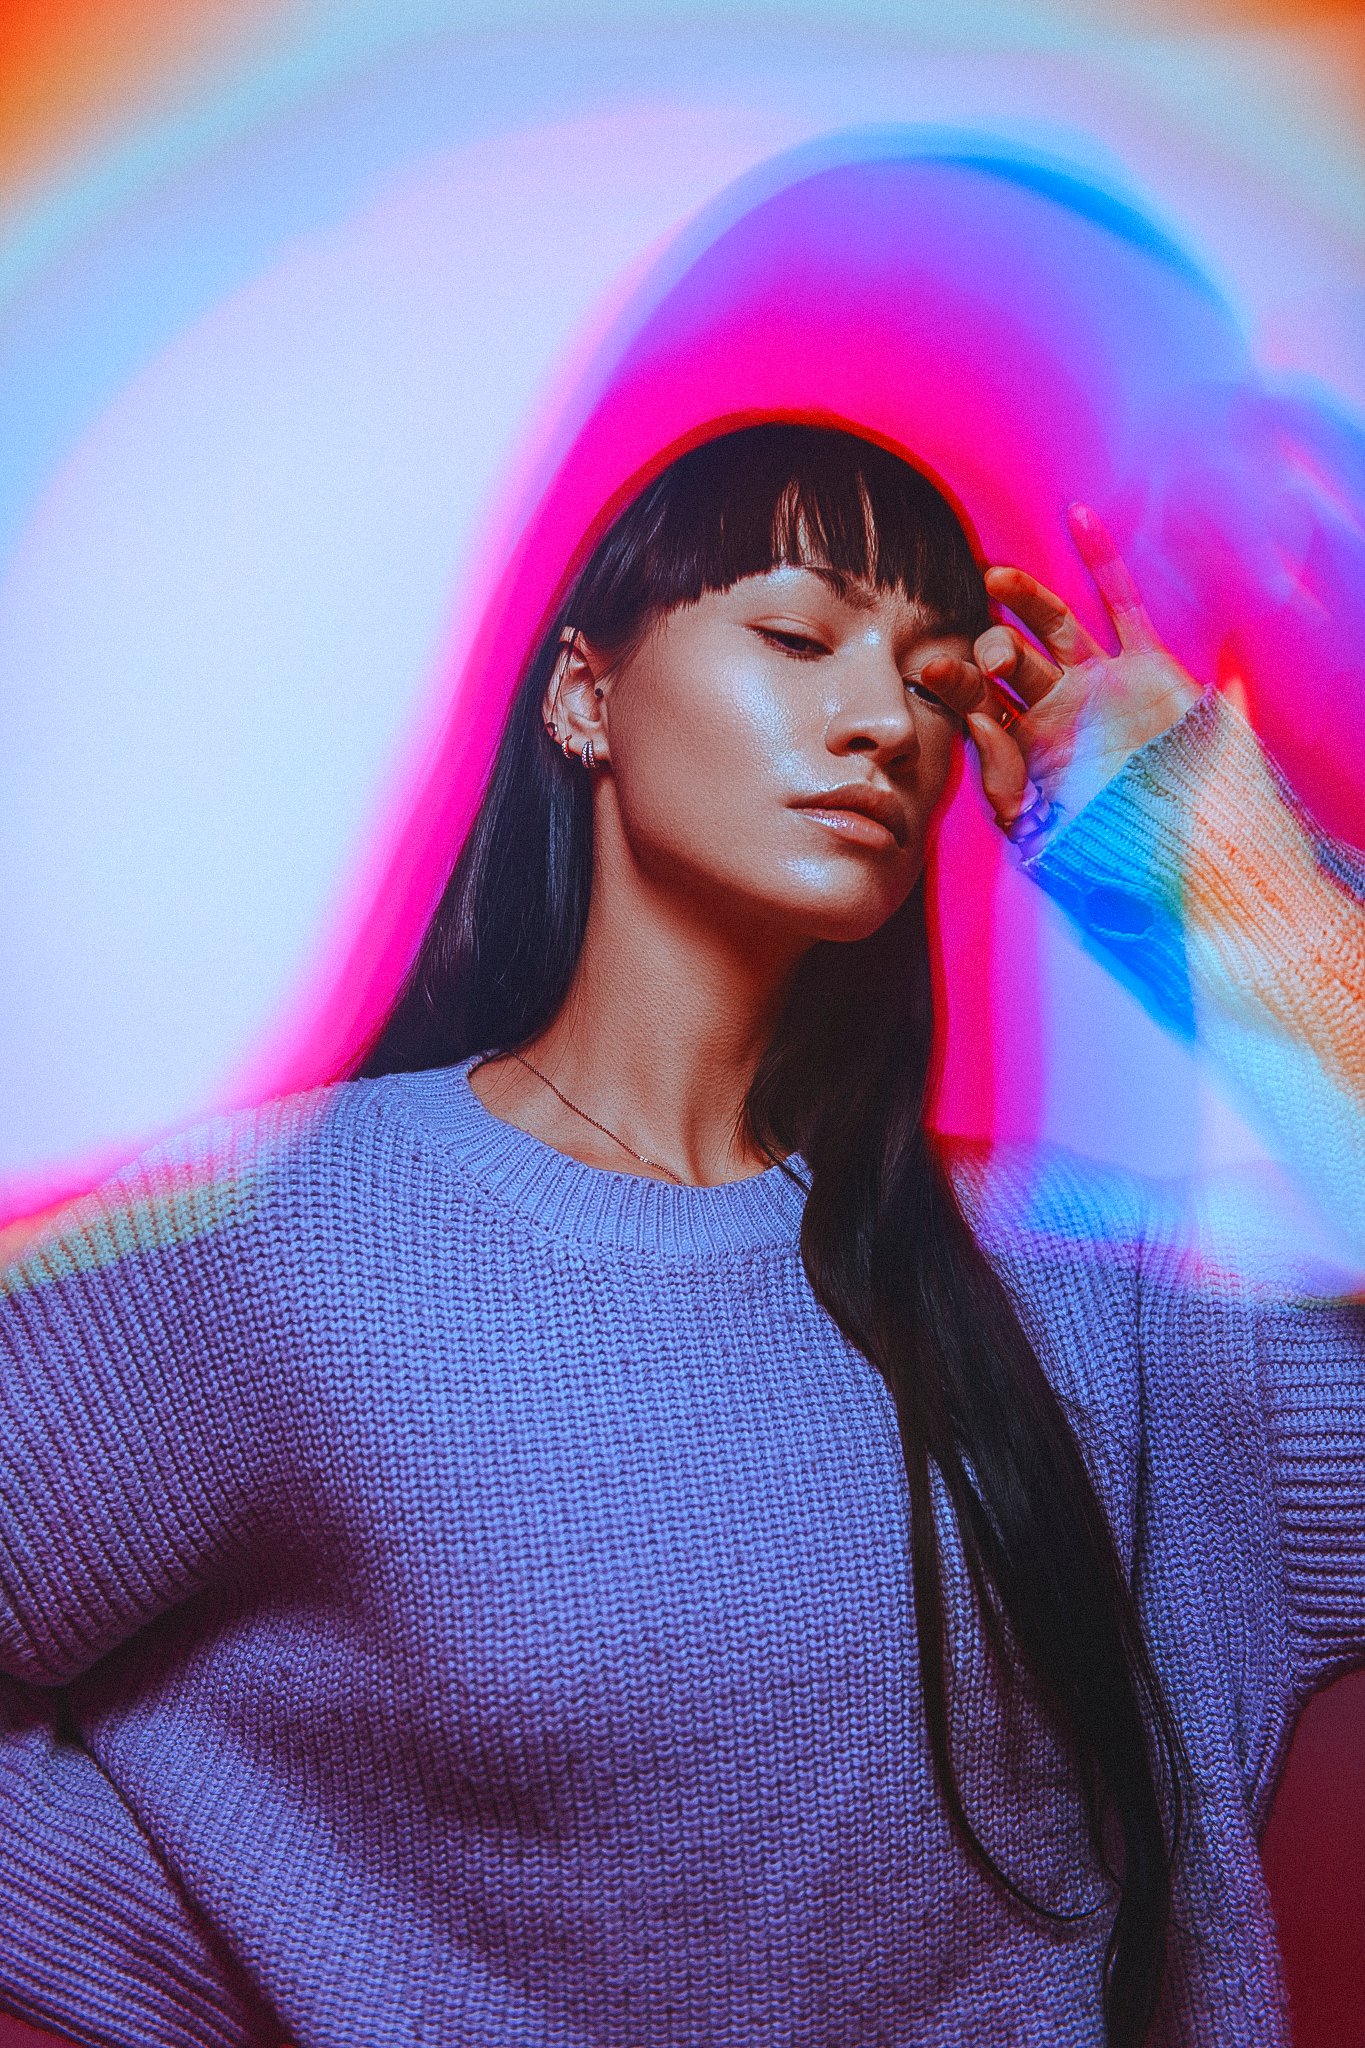
In the editorial above, the styling called for the model to be bathed in softer, pastel tones so as not drown out the outfit. The saturation slider on the RGB LEDs lets you achieve this look instantly and enables you to make precise adjustments to get the tone you need.
Incredible color control
I loved colored gels. In fact, for those who are aware of my work, I have sold hundreds, if not thousands, of my personal gel packs over the years. If anyone was invested in gels, it was me. But the creative in me is sadly stronger than the businessman, and I simply couldn’t resist the pull of millions of colors these new RGB LEDs offer.
Even at the peak of my colored-gel career, I probably only had and used around 15 or 20 colors! Today, nearly every RGB LED on the market has infinitely more colors than that, and the best ones now tout over 16 million! But do we really need that many colors? Well, no…. until you do.
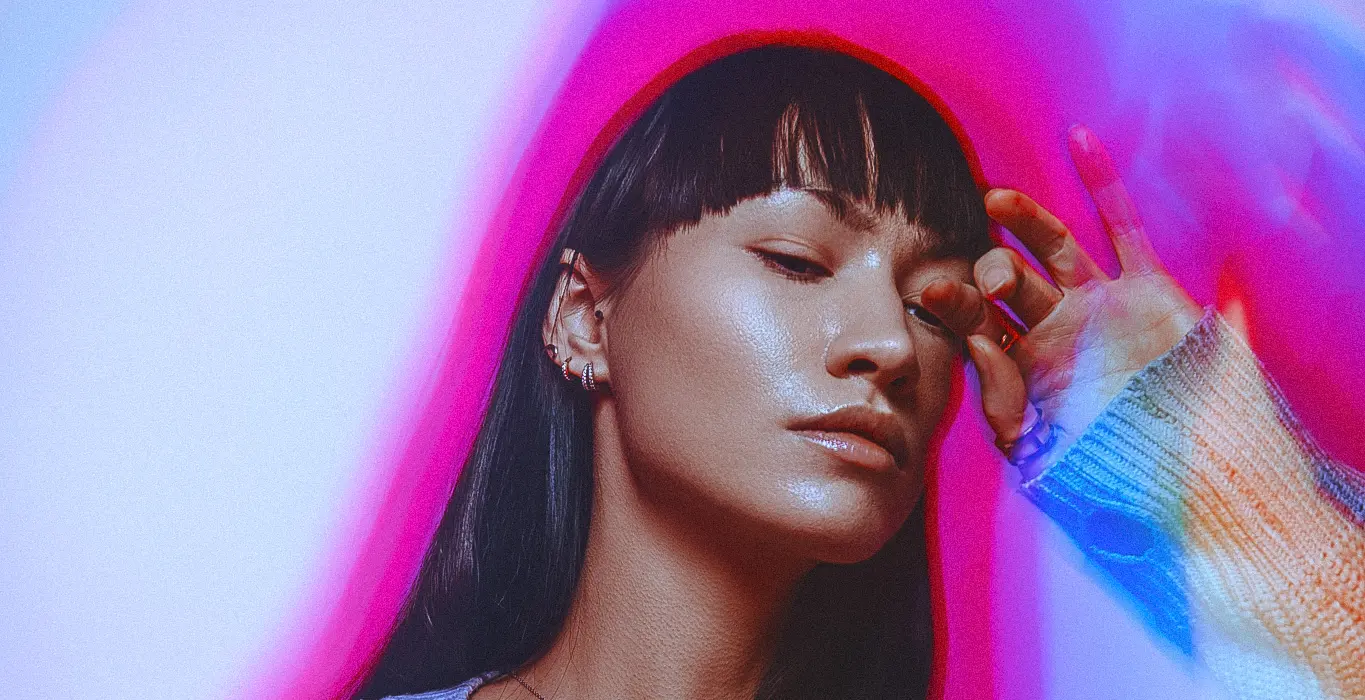
One of the core aspects of any good color image is harmony and balance. No image contains just a single color, and so the job is often about choosing the best colors to go together. Sometimes you’re using color theory to do this, and other times you’re simply matching colors to styling and backgrounds. It’s this last part that can make gelled lighting tricky. After all, it’s unlikely you have the specific green gel to match the model’s green leather shoes, or the exact pink gel to match the cyberpunk backdrop. This is where those 16 million colors become invaluable, as they allow you to finetune and select the exact tone and saturation of the light to match whatever you’re photographing. So no, you don’t need all 16 million colors… until you do.
In the shoot above, I had to match the model’s pink colored light to the background pink color. With RGB LEDs, this is extremely easy to do. Plus, since this is continuous light, it’s just as easy as turning the color dial until the colors match. With gels, this is infinitely harder to do, as you’re having to balance kelvin differences between the background and foreground, plus the modelling bulb showing you the actual color will often be a different color to the flash bulb that will ultimately fire and display the final color! Can you start to see why LEDs are becoming more than just a convenience now?
Jake Hicks has shot with flash since the nineties — so why is he suddenly excited about LEDs? The answer might surprise you.
From RGB flash to long exposure in a single light — Jake Hicks reveals what makes the L600C unlike anything else on the market.