How to make a fashion photography style guide

Having a style guide is essential to creating a brand look and ensures consistency in presentation no matter how many products you publish. In this fashion photography styling tutorial, we will show you how to create a style guide that can be easily followed by your stylists and photographers to give your web store a world class, consistent look.
A style guide is a set of visual instructions that guides photographers and stylists on how to present and shoot every different kind of garment that may be published online. It contains instructions on everything from how shirts should be styled i.e. folded, unbuttoned, shot on mannequin or flat lay to file naming conventions
If these instructions are not present, the way your clothes are presented on your website will not be consistent. This leads to issues such as customers not being able to compare similar clothes accurately and worse yet, it makes your site look unprofessional - especially if you’re uploading new products every day.
In short: without a style guide, your website will convert less. So in collaboration with some of the world’s leading fashion brands and retailers, we have developed a framework for creating an efficient style guide.
Efficiency is a fundamental part of any photography process, so the quicker a stylist can understand and learn how to recreate a certain style, the less time, money and resources it will take to get stunning product shots online.
Finding your brand style
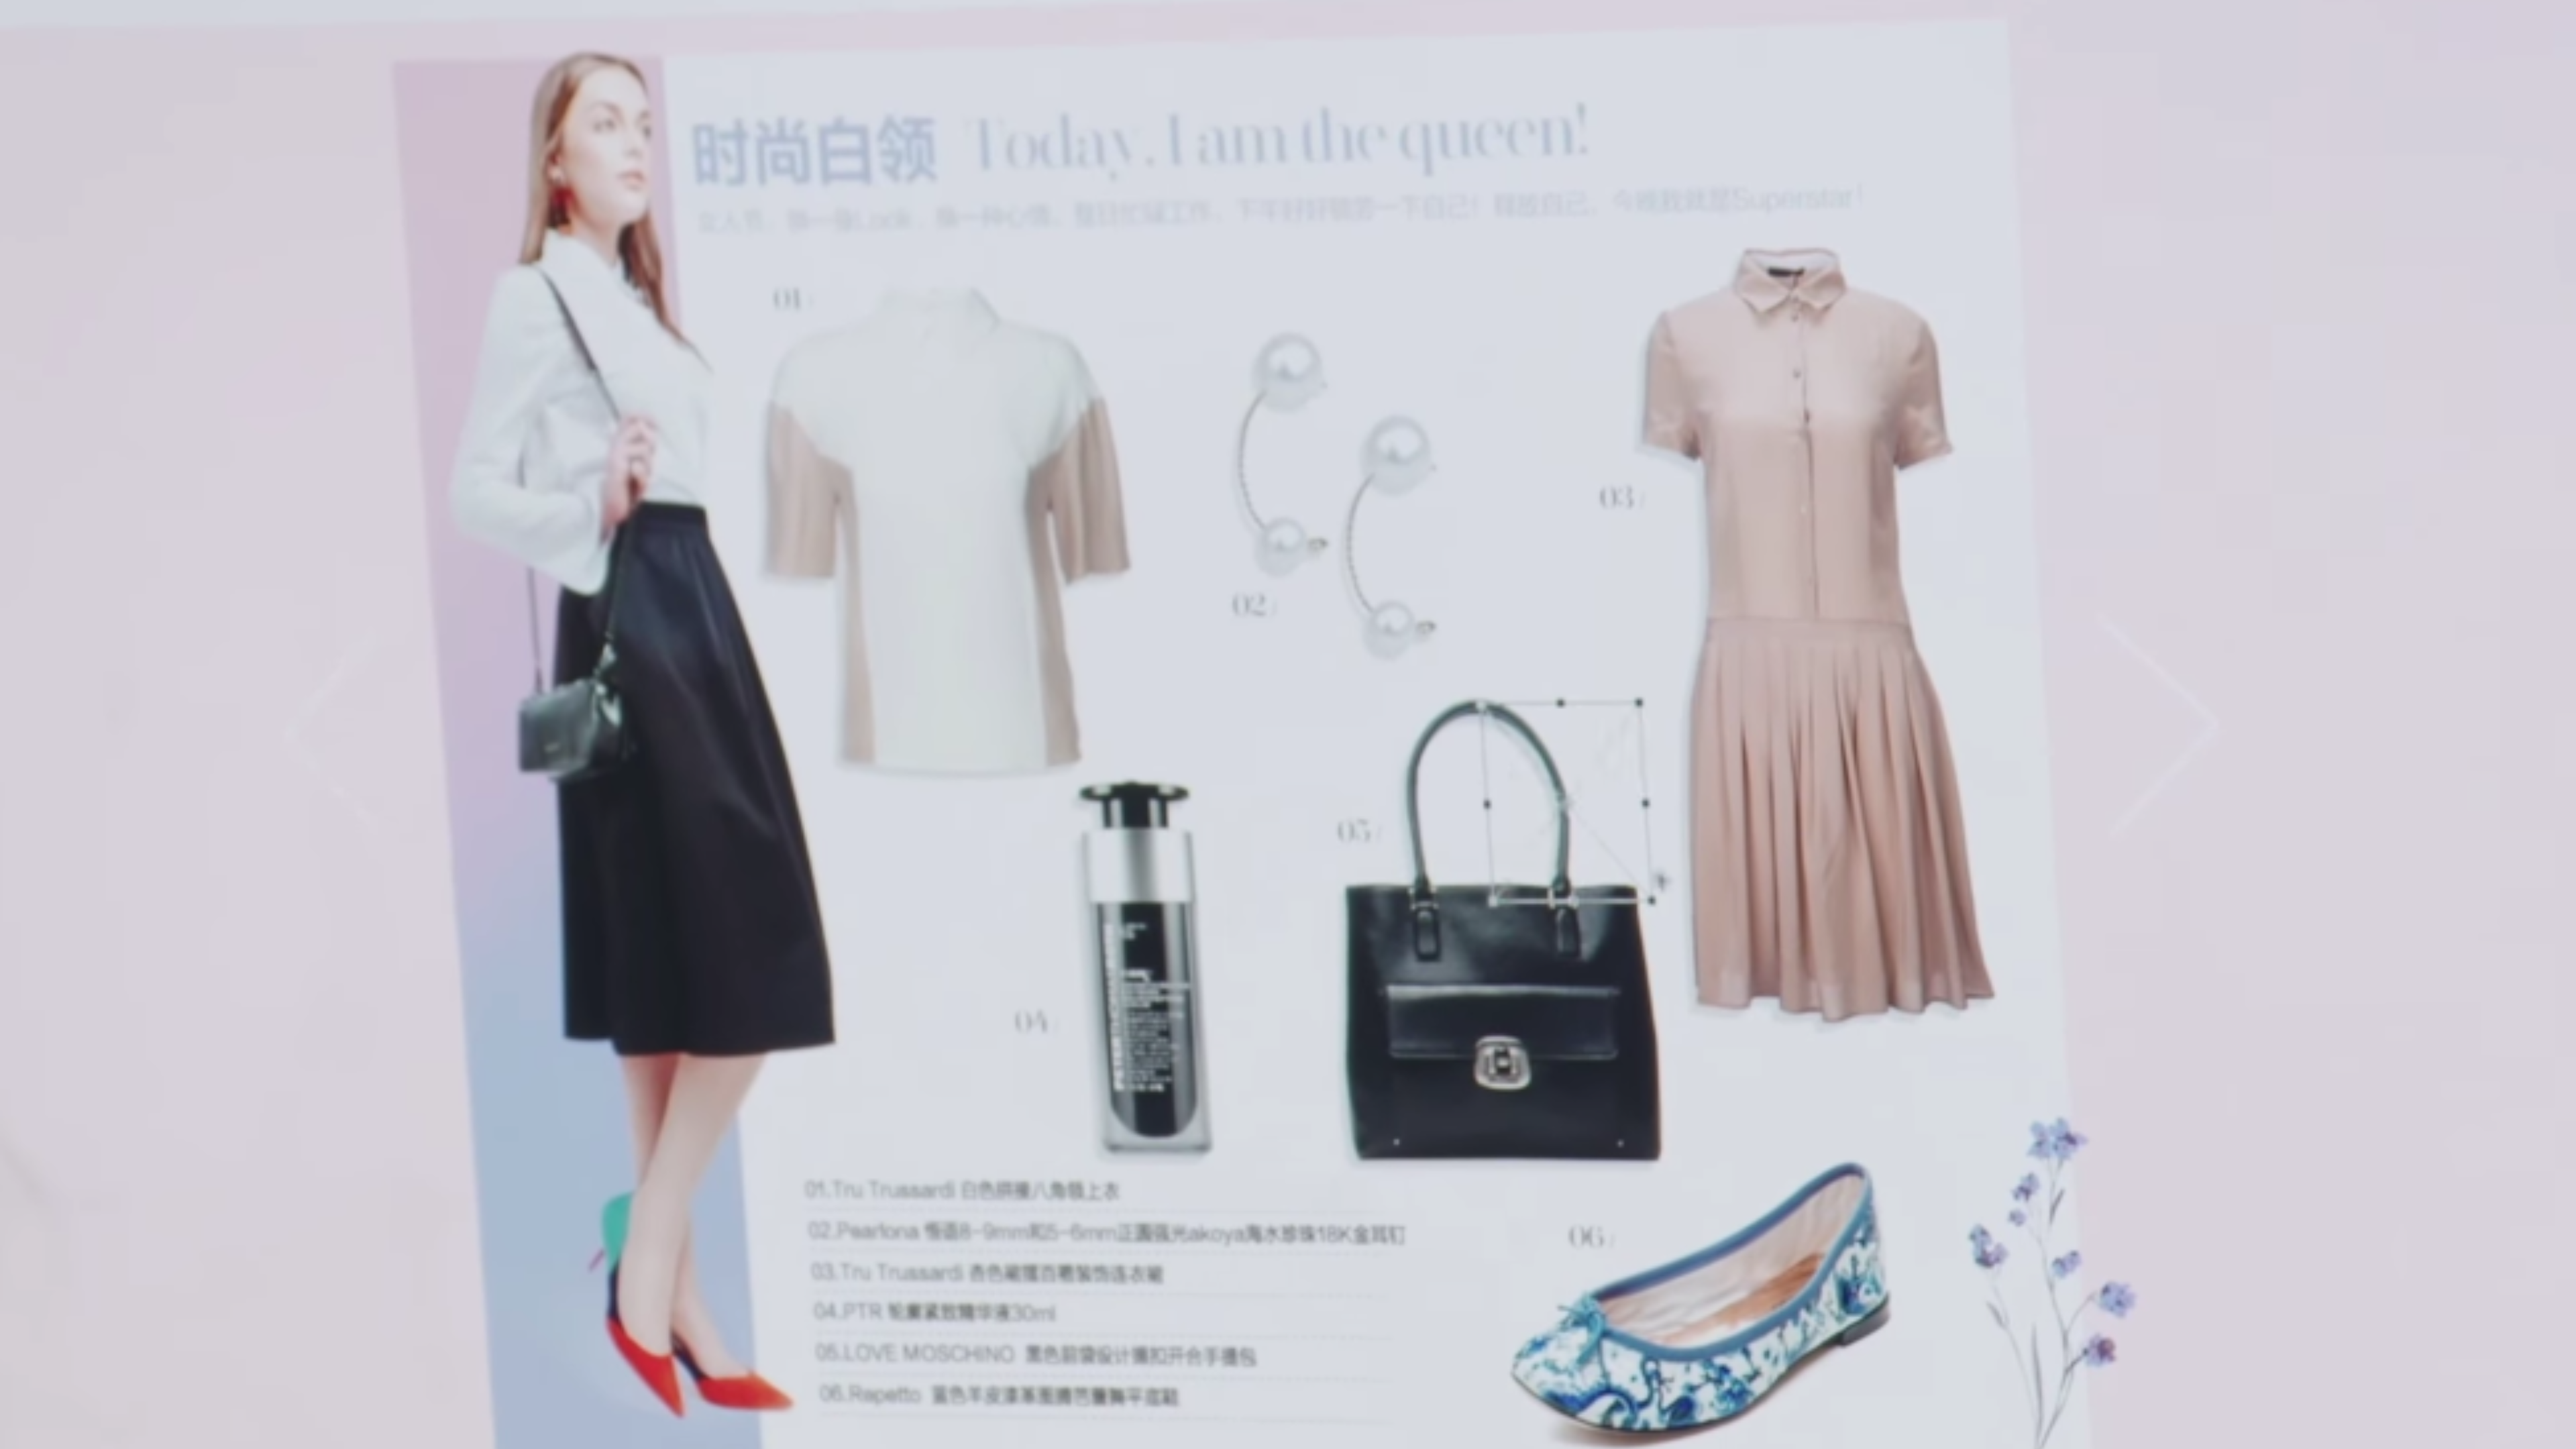
Most brands and retailers already have a brand style. A style guide can help not only in creating this style, but developing it. The ultimate aim of a brand style is to create a unique look that is associated with a particular brand and lifestyle.
If you don’t have a brand style yet, consider your target audience. If you are a kidswear brand for example, you may want to ensure that all of your clothes are shot in a certain way - laid flat on the table with bright lighting to emphasise colours, youth and vitality.
This is the first step in creating a brand style guide - thinking about who your brand needs to appeal to, and how it can do that through visual content.
Determining which shots to take
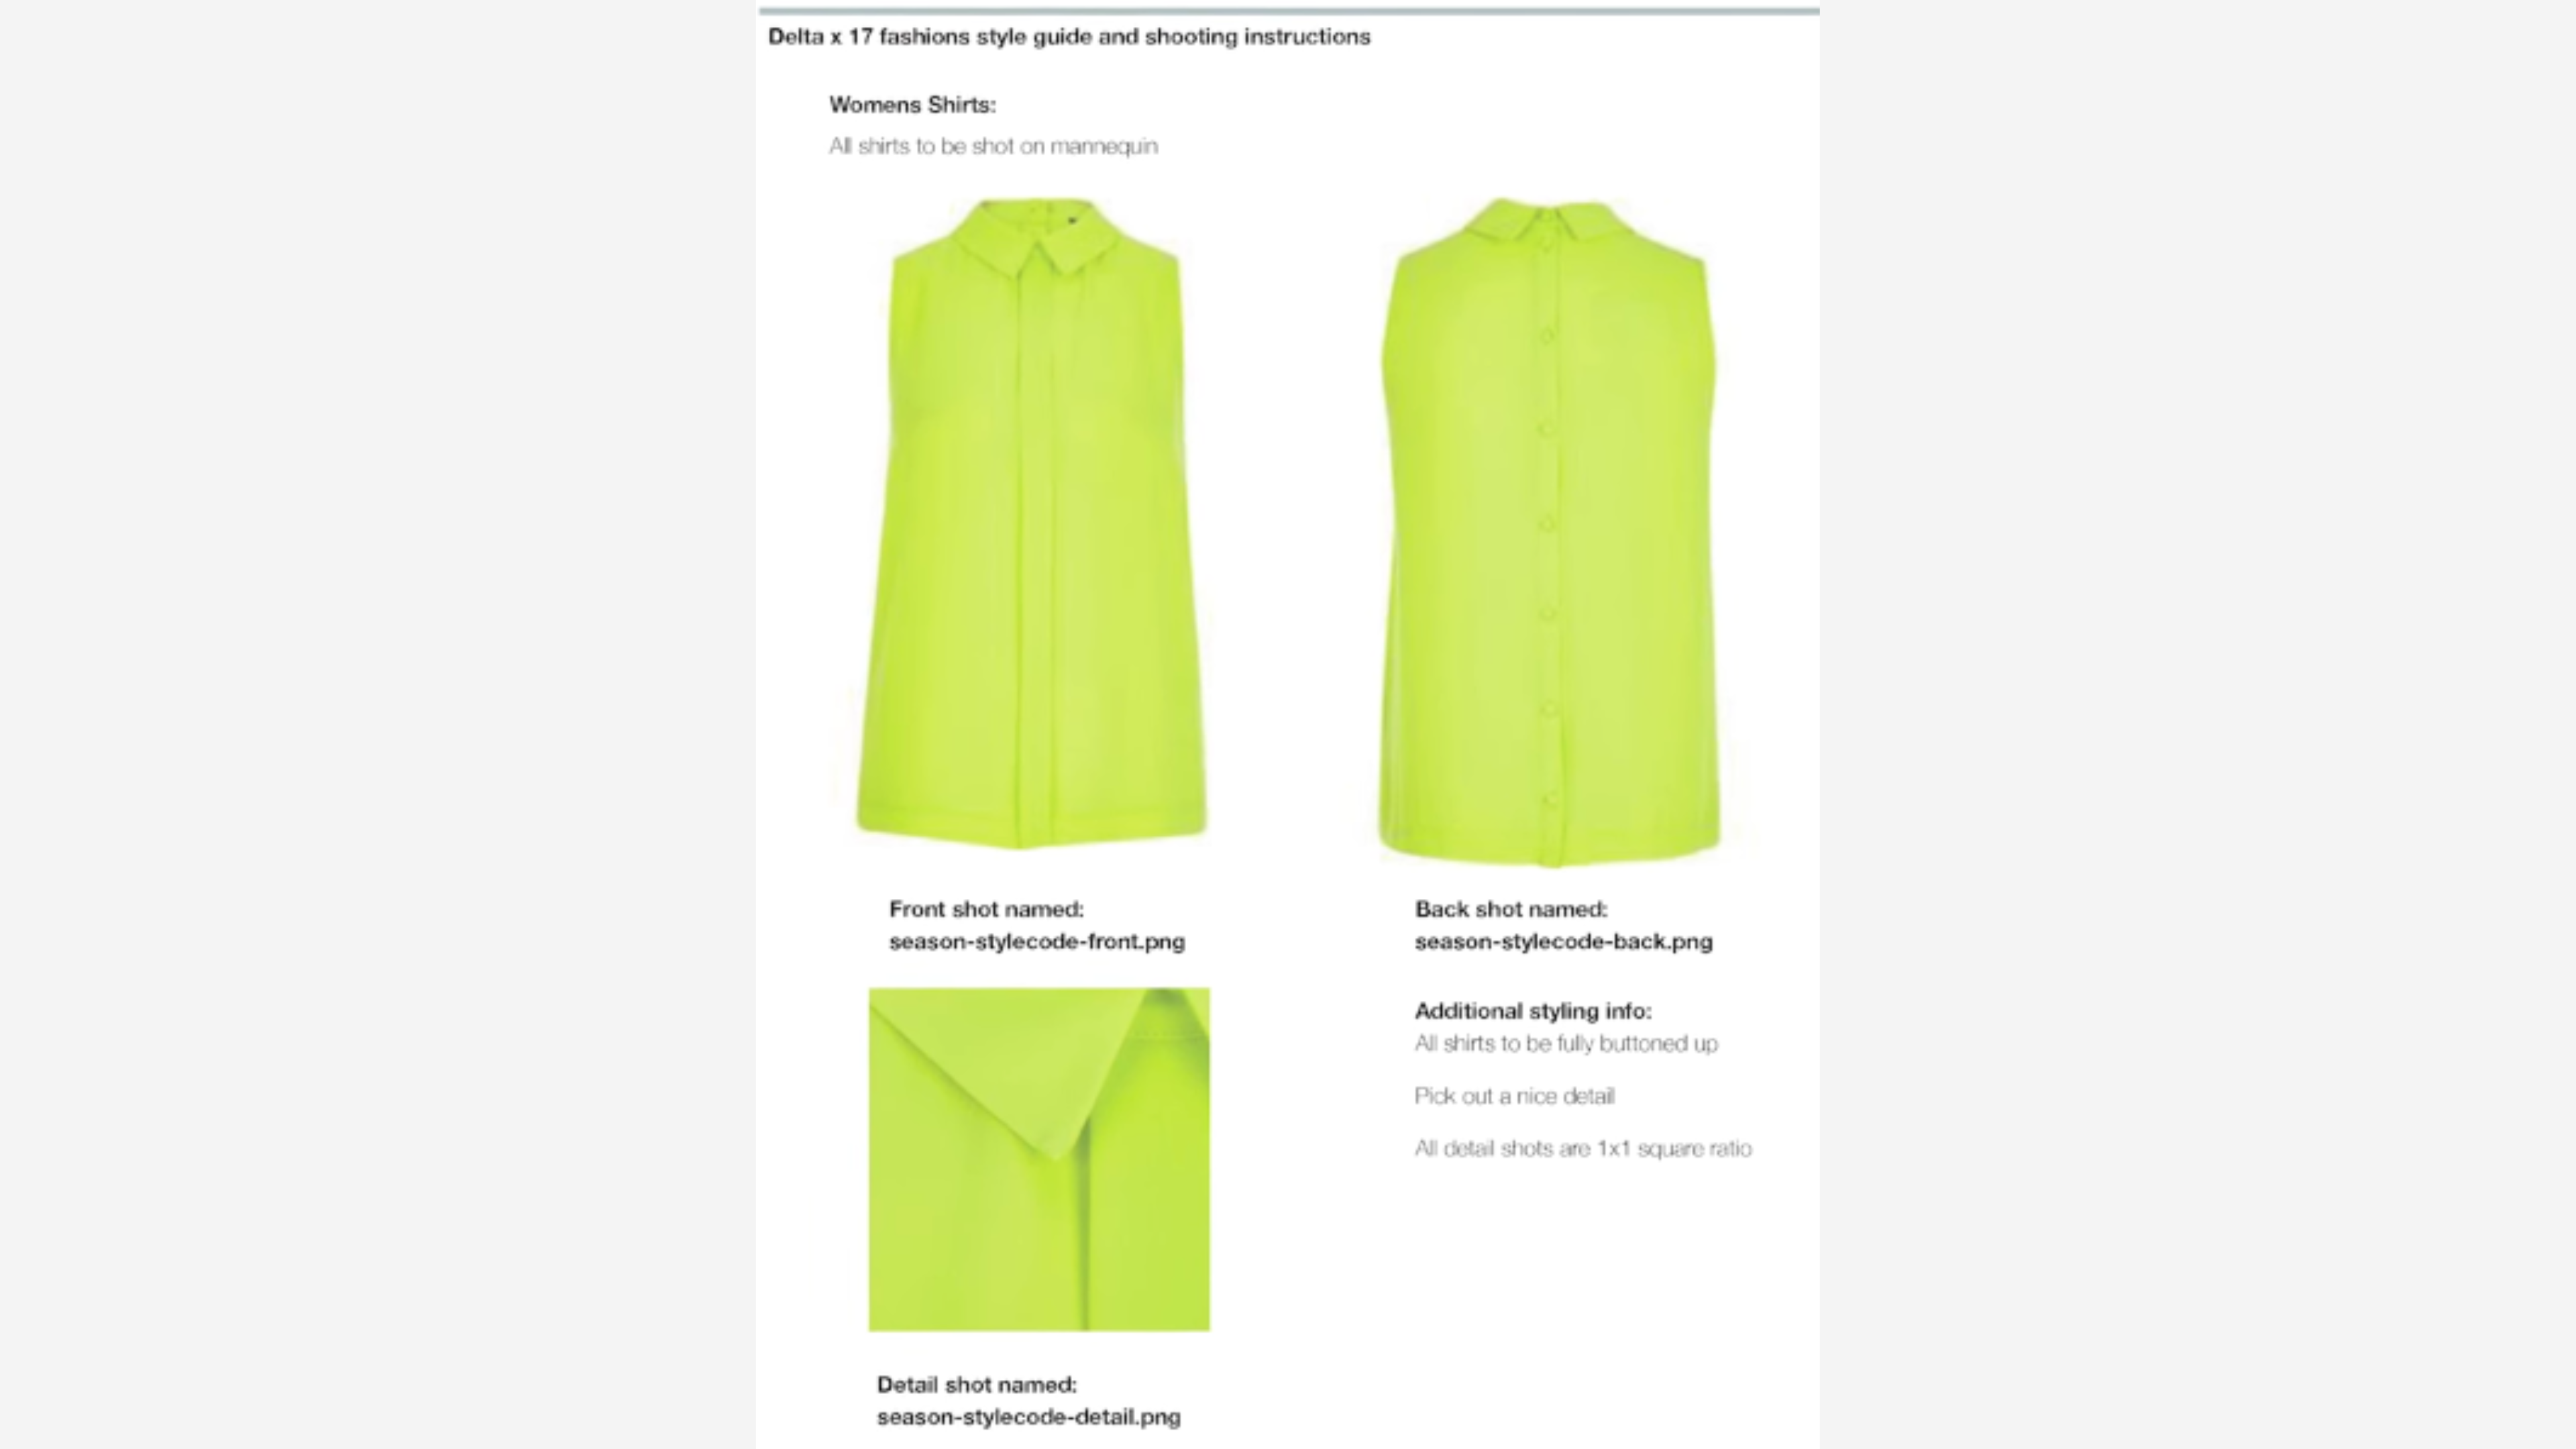
For each product you upload onto your website, you will need shots from different angles and distances highlighting on specific features of your product.
As you can see in this example, we've gone for a front shot, a back shot and a detail shot for this women's shirt.
It's a nice, simple guideline to follow that can be given to any stylist or photographer to recreate across a whole collection of similar products.
The information is presented in a simple grid and aims to give a stylist or photographer all of the instructions needed to refer to at a glance - helping them to work more efficiently.
Creating clear instructions for all of your products
A style guide must provide descriptions of what visual information to convey for every product that you shoot.
The level of detail in your style guide is dependent on your needs. If you'd rather a stylist have more creative freedom to shoot as they see fit, less instructions would clearly be beneficial.
However, if you want to maintain a complete control over your styling consistency - the more guidelines the better.
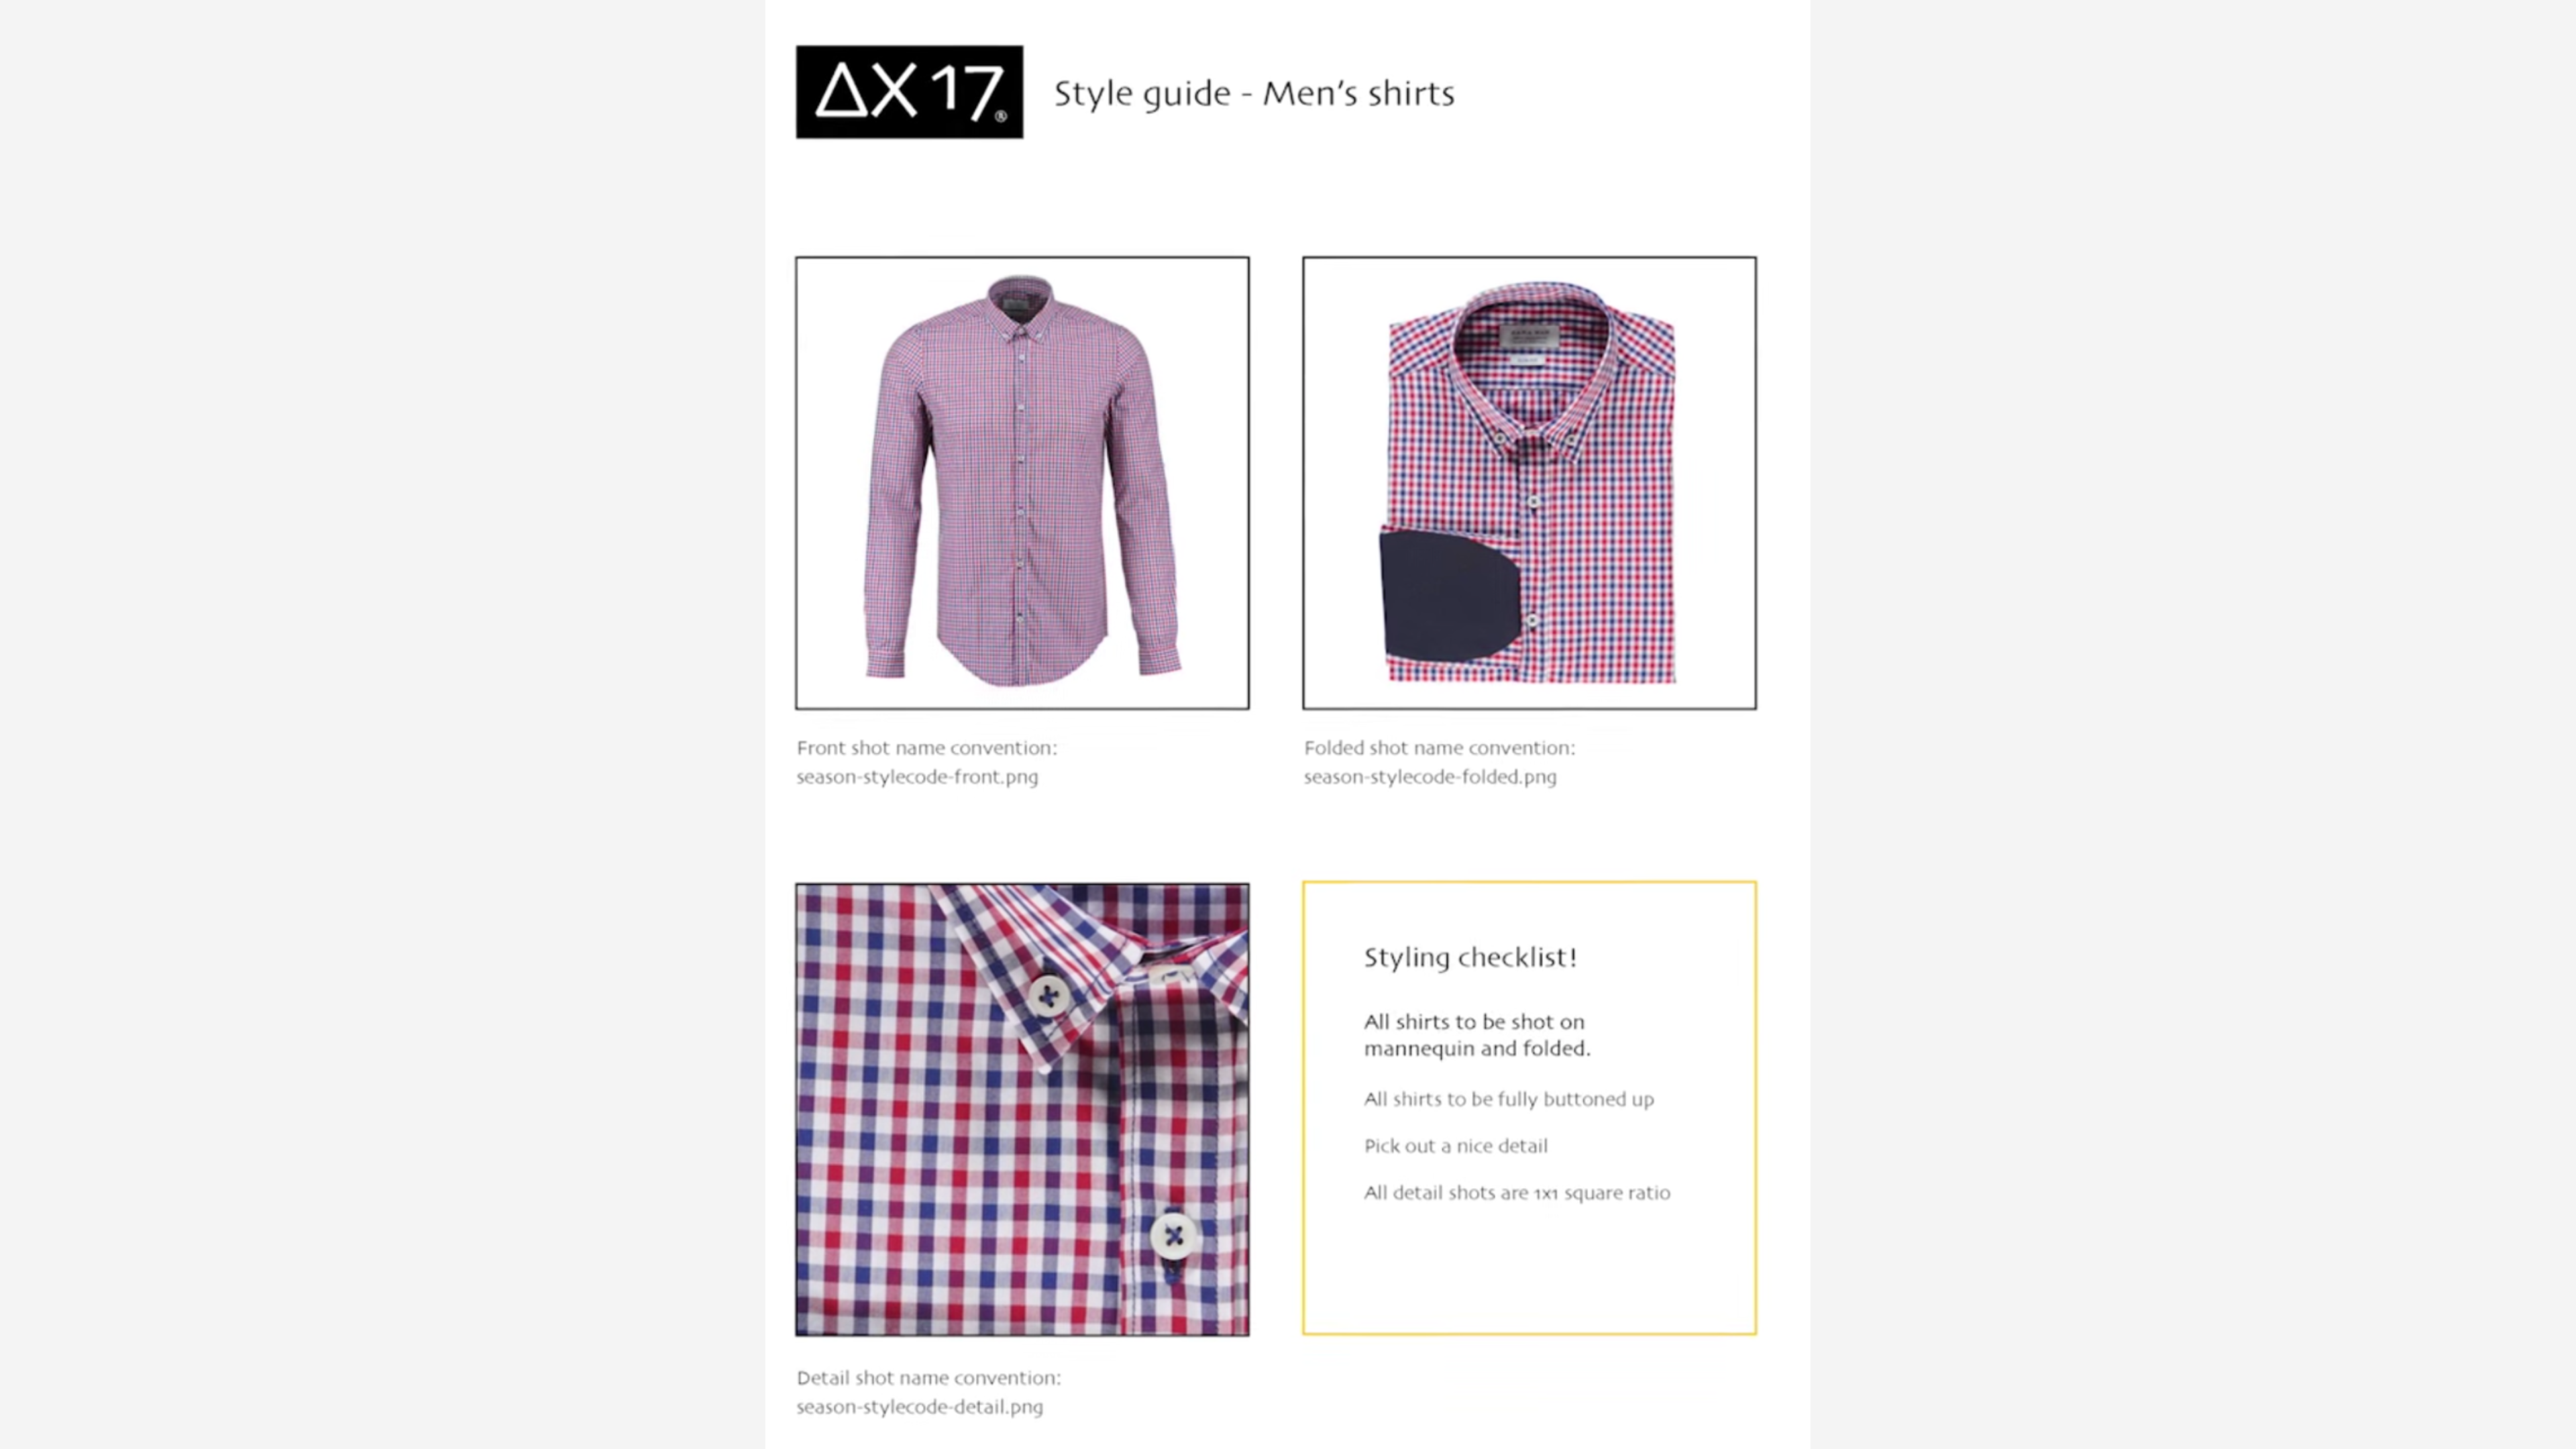
Determine whether you want your products shot flat lay or on mannequin - and if both, give clear instructions for each type of product.
For example, you can determine how the arms of a shirt should be folded, or whether it should be buttoned. You can even go all the way to describing elements of the studio setup like how the lighting should be done.
Determine whether you want your products shot flat lay or on mannequin - and if both, give clear instructions for each type of product.
Finally, file name conventions are important to set out in order to make your Digital Asset Management a lot easier.
Take a look at the example on the right to see what kinds of instructions you should include in your photography style guide for a single type of product.
Other tips and tricks to follow when making a product photography style guide
- Ensure all instructions are clear, concise and can be followed by anyone - regardless of technical knowledge.
- Give file naming conventions for each shot i.e. 'season-stylecode-front.png' and 'season-stylecode-back.png' to make sure your Digital Asset Management (DAM) is well maintained and searchable.
- Give instructions on using lighting to either create a more dramatic, shadowed look or conversely, a muted look (learn how to use light direction to bring out details in your products here).
- Give instructions on how much to over- or under expose your shots for even more ways to help determine a brand style.
- Find sources online showcasing other brand style guides for inspiration in creating - or further developing - your own.
- Leave a printed copy in your studio so other photographers and stylists can easily make use of it during a shoot - doing so will mean an easier time of maintaining consistency.
- Review your brand style guide from time to time to see which other ways you can make your eCommerce photography stand out from the competition.
- Consistency in your product photography is vital - without it, your store looks less professional and customers have a harder time comparing and visualising similar types of article.
