How to shoot a video of a model wearing a dress

Learn how to shoot a video of a summer dress for e-commerce.
In this tutorial, we’re gonna cover tips and tricks for taking a video of a summer dress for e-commerce.
What’s the difference between video and stills? Obviously, there’s movement involved. Why is that a good thing?
Think about the product that you’re selling - how the light hits it, how the fabric moves - these are really important things to show your customer. The best way to do that is through video.
Video has been found to not only reduce return rates exactly because of the more accurate product representation it depicts, but also to increase sales for the very same reasons.
This tutorial will teach you how to prepare for a video shoot of a summer dress, we’ll give you tips how to record your video and we’ll share some ideas for different shots you can take.
What you’ll need
- A model
- A style guide
- A studio setup with lighting and pro-grade camera
We cover the following stages
- Creating an atmosphere
- Recording your video
- Taking different shots
1. Creating an atmosphere
While building your set for your summer photoshoot, you have to think about the possibilities of your set design. How can you communicate the right atmosphere in the videos you’re taking? Will you have a colorful backdrop? Maybe even a fake wall at an angle? Are you going to use any props?
Make sure to build your set in such a way that, in the end, it will successfully represent the right feeling and vibe you’re going for.
Add the right shoes
Adding some high wedges to the summer dress you’re shooting could be a nice addition to your outfit. These type of shoes have the ability to lift the body up and make it look slimmer and more appealing.
Higher shoes also allow the model to get some more movement on set. Any motion will seem light and effortless. They also give the model the option to pose accordingly.
Choose backgrounds
Depending on the vibe you’re going for, you need to choose a fitting background on your set. The backdrop should fit your outfit and the look you’re presenting.
In this case, given that you’re shooting a summer dress, you can add a background that’s bright and summery (we’ve chosen yellow e.g.).
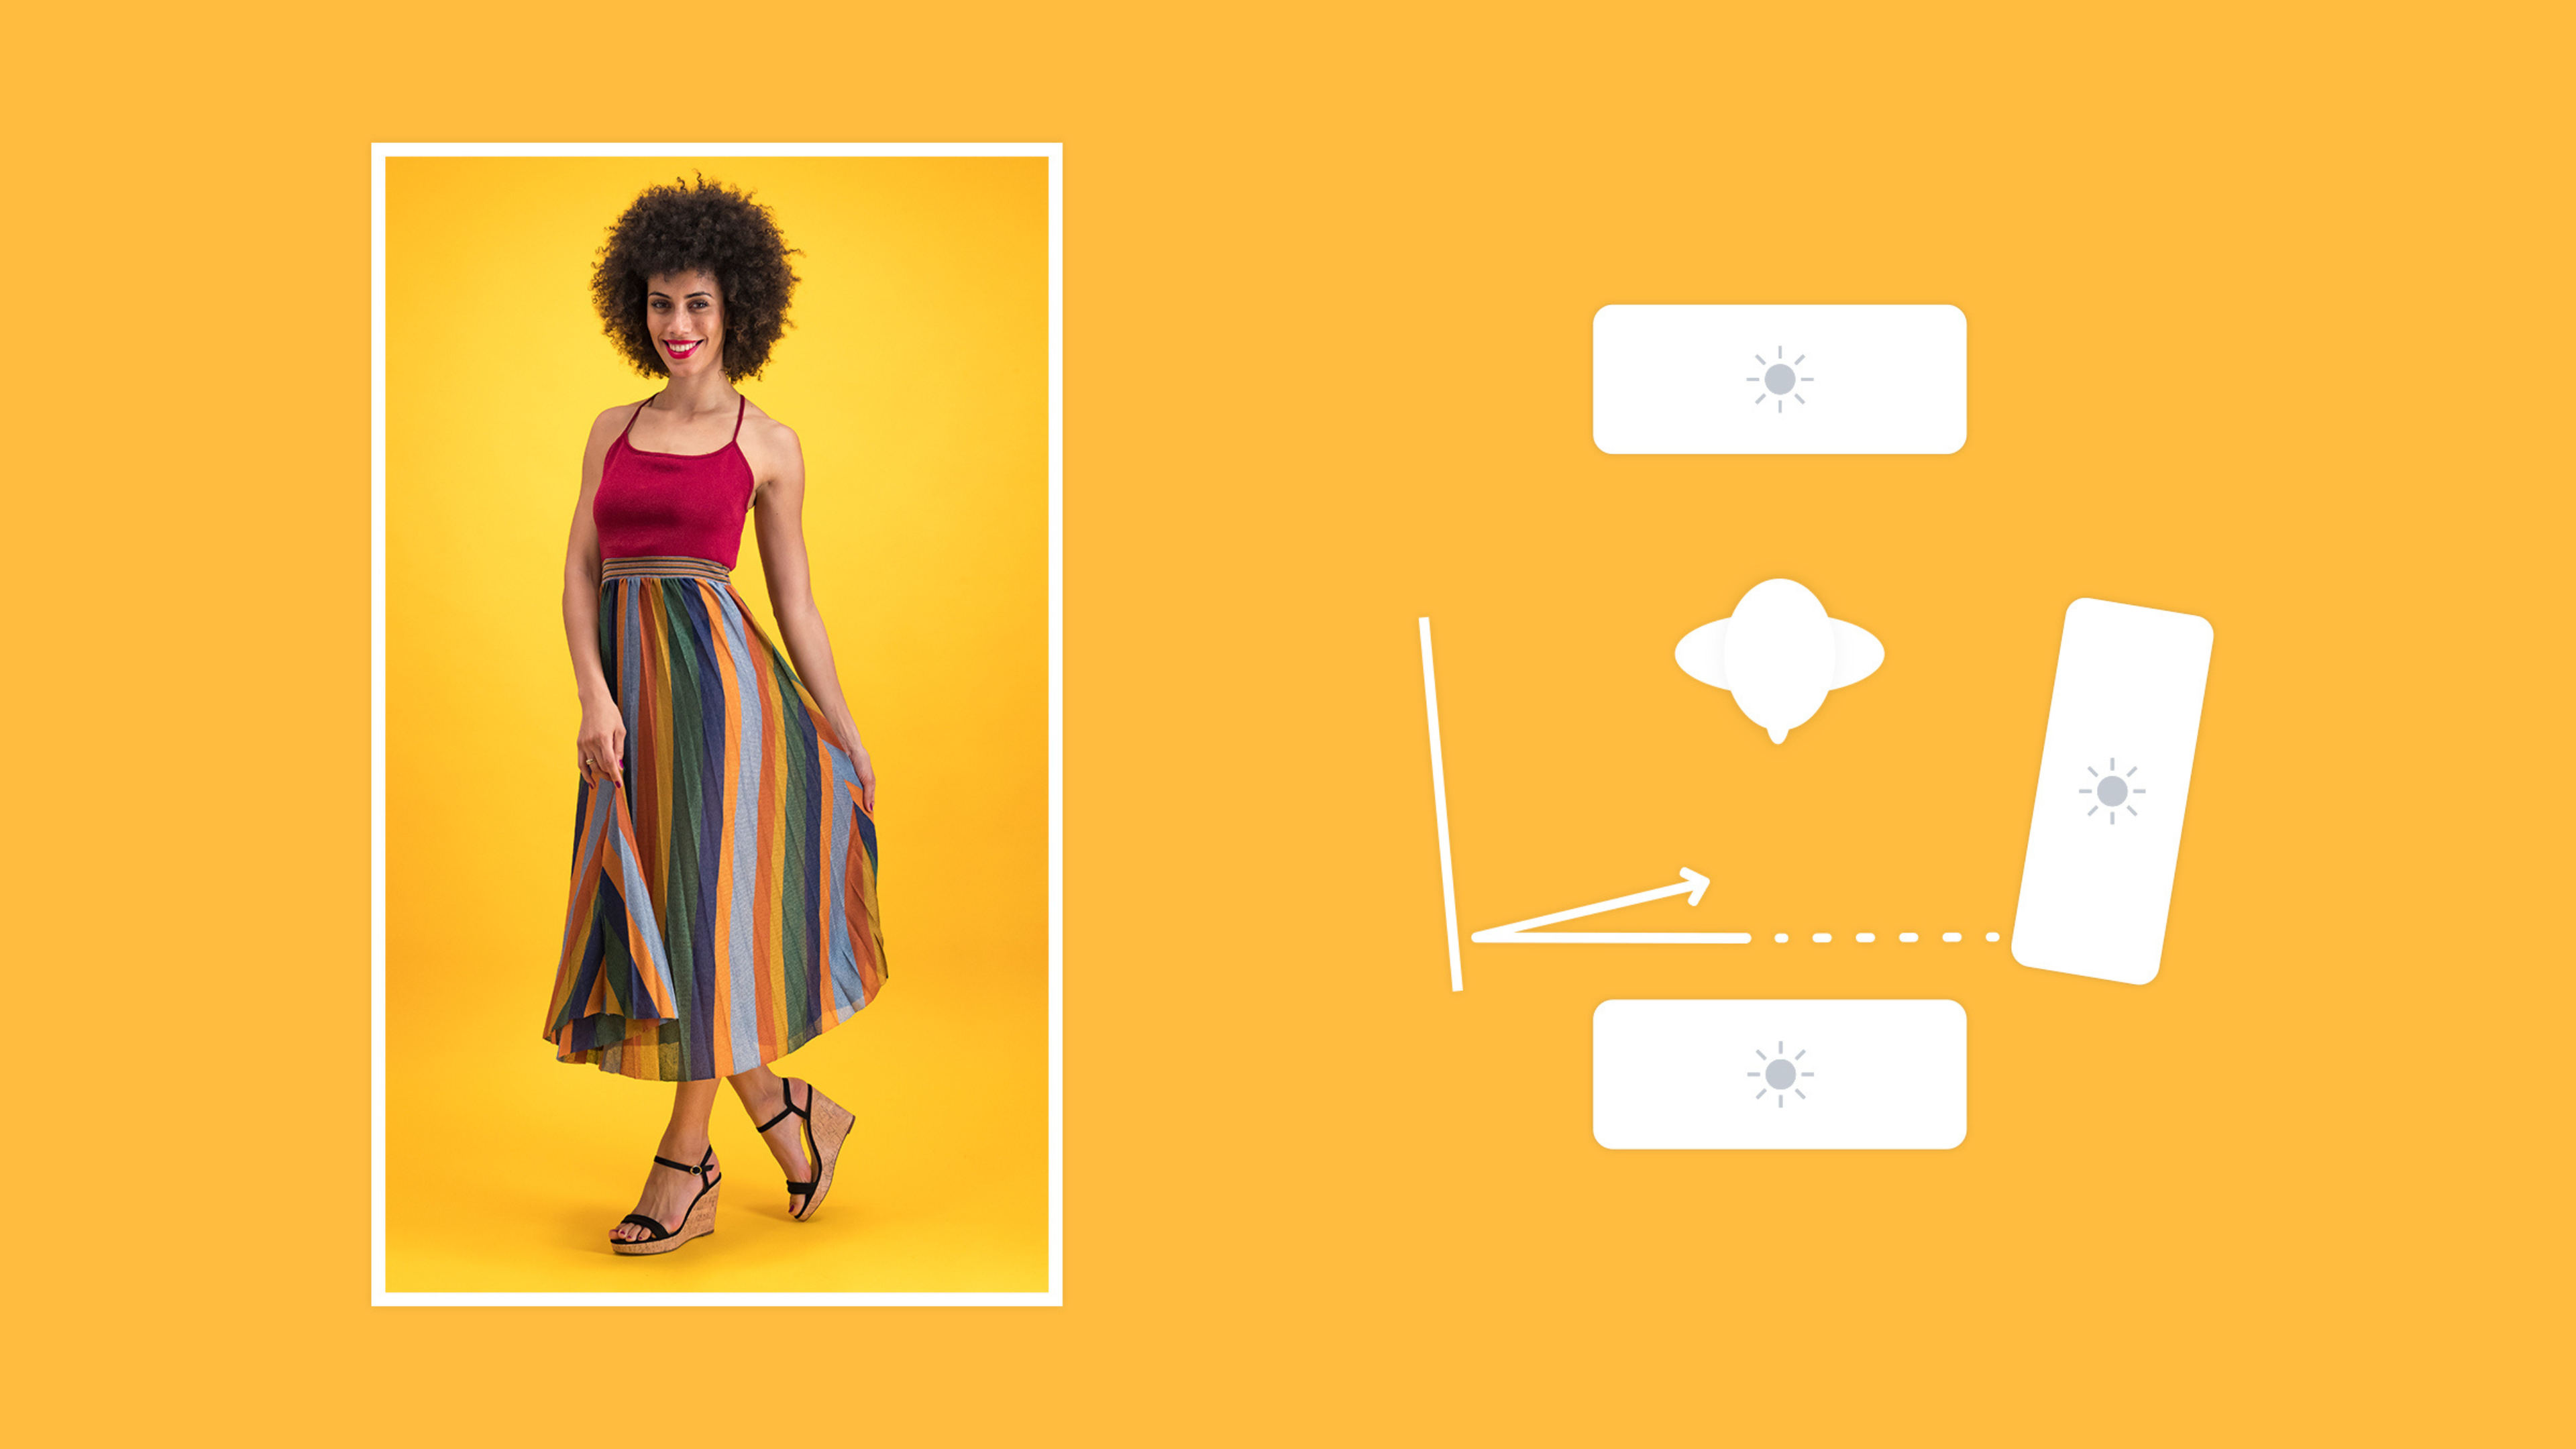
Set up the lighting
In order to put the products you’re shooting in the spotlight and create a more breezy, summery final image, you have to get more light on your model.
Position your key light on the right and your reflector on the left - that way the light can bounce off and will hit all the right angles. This will enable you to create a very airy and summery feel.
Don’t forget about music
Compared to static posing, music becomes even more important to set the tempo and atmosphere. Try to choose music that matches the movement you want to capture. Let the model engage with the music until they feel comfortable and are able to match their movement to the right atmosphere.
2. Recording your video
Video requires continuous, conscious movements without abrupt interruption. This concept can be new to a lot of models who may be used to doing static poses for stills. That’s why depending on the experience of your model, rehearsing movements in advance can be an important step before recording.
Put markers
Put markers down to let your model know where they should be standing, turning or moving toward. Have a start and an end marker and reset after each shot.
Stay in frame and focus
Keep checking after every recording that the model is fully in frame and the recording is sharp and completely in focus. Check if any vital parts are outside the frame like hands, feet, and hair. Adjust accordingly.
Experiment with different shots
When it comes to structure, you can aim to get 3 different types of angle shots for starters. Begin with a full frontal shot. Then move to a second, more zoomed-in shot. Last but not least, ask the model to turn around so you can capture the back of the dress.
That way you have 3 sections for your video and you could easily put that together in order to create one full product video for your audience. In our tutorial, we’re using a StyleShoots Live machine. The system automatically edits all different video sections into one video and then prepares the content to be ready for export within minutes.

2. Taking different shots
Video is a very powerful medium for showing off clothes, so the following section is all about how to translate your model’s posing from static to moving. With a little guidance, patience and timing, it’s possible to get anyone moving on video just right. We’ll be giving you some visual directions on a range of basic movement you can use with your models.
Train the back and forth sway
This movement is a simple sway from starting position back to the same orientation. It also works nicely in slow-motion. Over a short period, direct your model to sway back and forth while pivoting at the hips. The feet can be raised at the heel to add a more playful effect.
90-degree sway
This movement is a simple pivot to the left where the model will be turning from face on to side on. Over a 4 second period, direct your model to pivot at the hips or feet - depending on your chosen framing. Give cues to the model when you are beginning your recording, when movement begins, ends and when the recording stops. Be patient and keep reshooting until you get it right.
Walking into frame
This movement is about walking into the frame, stopping and giving a turn towards the camera. Pay attention to the placement of the feet and hands, making sure the feet are pointed toward and the hands don’t sway excessively. Walking into frame can be hard to time perfectly. Keep rehearsing and counting with your fingers to help your model get his or her movements right.
Creating videos for your e-commerce web-store is a great way to promote your products. Video can be much more influential than stills and it's been proven to increase sales.
By following the simple guidelines here, you’ll be able to create stunning videos for your brand in no time. Just remember to rehearse and not stop until you’re happy with the final result.